Showing posts with label Parents. Show all posts

Tuesday, July 29, 2014

Let's Rock!: Build a Bottle Rocket This Summer

Have you ever wondered what launches a rocket? Would you ever guess that it was something as simple as built up pressure? Well try it our for yourself and make a bottle rocket in your backyard this weekend!

Here's what you'll need:
  • An empty plastic bottle
  • Cardboard made into a cone and 4 fins
  • A cork
  • A pump with a needle adapter
  • Water
Now let's get started:
  1. Push the needle adapter of the pump through the cork and make sure it goes all the way through. To do this you may have to trim the cork down a little bit.
  2. Take your cardboard cone and fins and apply them to the bottle. (The cone at the top and the four fins at the bottom, so that the bottle resembles a rocket.)
  3. Fill the bottle with water until it's about a quarter full and then push the cork in tightly.
  4. Attach the pump to the needle adapter. If your bottle rocket won't stand up on it's own with the fins you made, rest it on a table, but if you make strong fins, you should fine and your bottle should stand up on its own.
  5. Pump air into the bottle and prepare for lift off! Make sure that everyone is standing away from the bottle as it will go up in the air with force after just a few seconds.


So what about the science? Check out Science Spark's explanation.

Wednesday, June 18, 2014

Summer Science: Magic with Milk

Beat the heat with this great summer science experiment! Grab these typical household items and start a journey full of exploration and discovery. In this popular Dr. Mad Science experiment, you and your young scientists will observe how milk reacts with food coloring and soap.

Here's what you'll need:
  • Milk (it is recommended that you use 2%)
  • A bowl
  • Food coloring
  • Q-tips
  • Dish Soap (it is recommended that you use Dawn)
Now let's get started:
  1. Start by filling the bowl with milk and waiting for all the bubbles to go away.
  2. Put a large amount of food coloring in the center of the milk.
  3. Take Q-tips and dip them into the dish soap. Then put them in the middle of the bowl for 15 seconds.
  4. Watch as the food coloring expands on the surface of the milk.
So what about the science? Well here it is: milk contains protein and really small amounts of fat in it. Both proteins and fat are sensitive to chemical changes. The chemicals in the dish soap weaken the chemical bonds that hold the protein together in the milk solution and the food coloring allows us to visually see the changes in the protein molecules. Likewise, the soap molecules cause the fat in the milk to mix and swirl until the fat has been distributed across the entire amount of the milk.

Watch Dr. Mad Science do it!

Wednesday, April 23, 2014

What to do with All Those Leftover Peeps: A Dissolving Experiment

Easter has passed and if you're joining in a candy coma, we don't blame you. But if you don't think you could stuff another Peep in your mouth if your life depended on it, we don't blame you there either. Do you wish you could just make those sugar-filled, fluffy marshmallows disappear? Well consider your wish granted: cue the dissolving peep experiment.

Here's what you'll need:
  • Water
  • Vinegar
  • Apple Juice 
  • Soda 
  • Laundry Detergent 
  • Five Clear Glasses
  • Five Peeps of your Choice

Once you've gathered the goods, it's time to get started.
  1. Start by arranging your glasses on a tray. Add one Peep and one of your five liquids/solvents to each glass and label them. 
  2. Now for the hard part: waiting. As you wait to see what will happen to your Peeps, write down predictions - what you think will happen and why.
  3. After three hours, check on your marshmallow friends and record what kind of changes you see. At this point, the only thing you should be noticing is color change.
  4. After 16 hours, take a peek at your Peeps again and see what's changed. More color change should be occurring, though you might not notice any dissolving yet.
  5. On day two, you'll start to see signs of the Peep in the vinegar dissolving, and b day three, you'll notice the Peep in the apple juice starting to dissolve.
  6. End your experiment on day four (or keep on keepin'-on if you wish!). Carefully take each Peep out of their respective cup and observe what's left of them.
  7. Record what you observe (amount of Peep dissolved, color change, shape change, texture change, etc.) and have your kiddos write down why they think the Peeps reacted differently in each solvent.
If there's too many Peeps in your house for you to count at this point, do the experiment again and try out different solvents!

Tuesday, September 10, 2013

STEM Interest Among Teens Declining?

CBS News reported yesterday that STEM interest among teens is actually declining. This may seem strange given the economy's current state and the difficulty finding a job many members of the younger generation are facing, but experts at the Partnership for a New American Economy project say that there will be a shortfall of 230,000 qualified advanced-degree STEM workers by 2018.

At a time when most buzz about STEM and the initiatives in place to make it more exciting and relevant in today's schools is positive, this comes as a total downer. As stated in the CBS News report, the Partnership for a New American Economy project's Junior Achievement USA and ING U.S. Foundation teamed up to survey 1,025 teens about their career plans. This is the 12th year that they have conducted the survey, and nearly half of the students ranked STEM and medical-related fields as their top choice. Forty-six percent sounds encouraging, but that is a 15 percent decline from the 2012 survey, when 61 percent of students considered STEM their top choice.

So what's happening? Where is the disconnect between efforts being made to make STEM the go-to choice for student interest and actual student interest? Are U.S. students just simply more interested in other fields than they are STEM fields?

As CBS explains, regardless of whether there is a shortage, the first step in developing a deeper American talent pool is bolstering student interest in STEM fields. The question now: how are we going to do that?

It appears we may to go back to the drawing board, reevaluate current initiatives and efforts and implement some changes.

Check out the full CBS News report for detailed commentary on the topic and more information.

Friday, September 6, 2013

'Science' Moving on Up as Most Important School Subject

There's good news for all you science lovers out there: a new Gallup poll finds that three times as many Americans now say science is the most valuable school subject (MVS) than did so more than a decade ago. As reported by LiveScience on Mashable, science bumped out history for the third spot behind No. 1 math and No. 2 language arts as the school subject that has been most valuable to Americans' lives. This is exciting news!

In the new Gallup poll conducted earlier this month (Aug. 7-11), 12 percent of respondents mentioned "science/physics/biology" as the MVS. In the same poll conducted in 2002, a mere 4 percent felt the same way.

Interestingly enough, it appears that education and gender played a part in affecting people's answers. Respondents who had high levels of education were less likely to choose math as the MVS. Likewise, men were more apt than women to give math the top spot - 40 percent versus 28 percent, respectively. Men were also more likely than women to choose science as most valuable.

The poll results are based on phone interviews with a random sample of 2,059 Americans, ages 18 and over, from all 50 U.S. states and Washington D.C. Results were weighted so they were nationally representative. Further, respondents were allowed to look back at their entire education when gauging the value of subjects, including elementary all the way through postgraduate school.

For more information on the poll results and to see specific excerpts and statements from the Galllup statement, check out the Mashable article. The importance of science is making a name for itself and we're moving in the right direction!

Wednesday, August 21, 2013

Back to School: Be STEM Ready

You want to be STEM ready this year but getting together all of the resources - like, say a brand new multi-million dollar facility, STEM-prepared training for your staff and a plethora of STEM materials to name a few - can be tricky to say the least. But there's good news: your school is not alone. Go ahead and categorize yourself with all of the other schools doing everything they can to just get this STEM thing off the ground.

Nevertheless, Anne Jolly shows you how you can ramp up for some great STEM learning by following advice gathered from educators who have been teaching STEM classes successfully for several years. Let's get started!

As Jolly explains, prepare yourself for a noisy classroom where multiple right answers abound and failure is regarded as a positive step toward discovery and successful solution. You'll need to get ready for your kiddos to work closely together, using hands-on methods to solve real-world problems. This also means being willing to take a step back and give your students enough room to kick off their journey toward becoming creative, innovative, critical thinkers. 

Take a look at this checklist of five questions that your school needs to consider to get ready for their STEM adventure.
  1. Does everyone know why the school is implementing STEM and what STEM is designed to accomplish?
  2. What type of STEM program will your school implement initially and what do you want this program to become?
  3. How will you prepare and support teachers? What do teachers know/need to know, and how will they learn it?
  4. What will your school do about STEM curriculum?
  5. What resources are available?
Jolly cites answers to all five questions in her article on KQED's blog, Mind Shift. She even offers up multiple reasons or answers per question to make it easy for you to find one that applies to your school's situation. Check them out here.

In short: your school can be STEM-ready as long as you have a starting point and a long term goal. Jolly reminds us that the STEM initiative will keep growing with some visionary leadership. That being said, a knowledgeable and supportive school principal is the most important driver behind a STEM initiative. 

Another great Jolly suggestion: get a group of extra supportive parents to form a STEM booster club. 

Monday, August 12, 2013

Summer Science Experiment: Making Magic with Milk

The summer is winding down, but there's still time to squeeze in just a few more experiments before your kids head back to school. As usual, this experiment involves a small list of household products, but the end result reflects exploration and discovery. In this popular Dr. Mad Science experiment, you and your young scientists will observe how milk reacts with food coloring and soap.

Here's what you'll need:
  • Milk (it is recommended that you use 2%)
  • A bowl
  • Food coloring
  • Q-tips
  • Dish Soap (it is recommended that you use Dawn)
Now let's get started:
  1. Start by filling the bowl with milk and waiting for all the bubbles to go away.
  2. Put a large amount of food coloring in the center of the milk.
  3. Take Q-tips and dip them into the dish soap. Then put them in the middle of the bowl for 15 seconds.
  4. Watch as the food coloring expands on the surface of the milk.
So what about the science? Well here it is: milk contains protein and really small amounts of fat in it. Both proteins and fat are sensitive to chemical changes. The chemicals in the dish soap weaken the chemical bonds that hold the protein together in the milk solution and the food coloring allows us to visually see the changes in the protein molecules. Likewise, the soap molecules cause the fat in the milk to mix and swirl until the fat has been distributed across the entire amount of the milk.

Watch Dr. Mad Science do it!

Friday, August 2, 2013

Summer Science Experiment: Backyard Bottle Rocket

Have you ever wondered what launches a rocket? Would you ever guess that it was something as simple as built up pressure? Well try it our for yourself and make a bottle rocket in your backyard this weekend!

Here's what you'll need:
  • An empty plastic bottle
  • Cardboard made into a cone and 4 fins
  • A cork
  • A pump with a needle adapter
  • Water
Now let's get started:
  1. Push the needle adapter of the pump through the cork and make sure it goes all the way through. To do this you may have to trim the cork down a little bit.
  2. Take your cardboard cone and fins and apply them to the bottle. (The cone at the top and the four fins at the bottom, so that the bottle resembles a rocket.)
  3. Fill the bottle with water until it's about a quarter full and then push the cork in tightly.
  4. Attach the pump to the needle adapter. If your bottle rocket won't stand up on it's own with the fins you made, rest it on a table, but if you make strong fins, you should fine and your bottle should stand up on its own.
  5. Pump air into the bottle and prepare for lift off! Make sure that everyone is standing away from the bottle as it will go up in the air with force after just a few seconds.

So what about the science? Check out Science Spark's explanation.

Friday, July 26, 2013

Summer Science Experiment: Make it Rain!

You may have more rain than you'd like this summer, but for those sweating out the summer and doing their best to make it through another drought, the four letter word never sounded so good.  Either way, why not make some rain of your own?! Help your kids understand the weather and what really causes it. This might even help curb some weather related fears your little ones are hanging on to. 

Grab these items to get started:
  • Glass Jar
  • Hot, hot water
  • Plate
  • Ice Cubes
Once you have you're supplies, get started! (And it's totally okay to call yourself the rain man/woman if you'd like.)
  1. Heat your water until it is just about boiling and pour it into your glass jar.
  2. As quickly as you can, cover the glass jar with your plate and then place the ice cubes on top. You might also want to keep a towel handy for any unexpected spills that might occur.
  3. Sit back and watch what happens as it begins to rain inside your jar! 
So what's really happening, here? The warm, moist air from the water rises and mixes with the cool air created by the ice cubes causing condensation first, and then rain. 

Friday, July 19, 2013

Summer Science Experiment: Ocean in a Jar!

Heat waves are affecting everyone this summer and nothing sounds better than hitting the beach to relax and cool off. If you can't go to the beach, make this ocean in a jar with your kids this weekend - complete with lessons about density and waves. The catch? They'll be having so much fun they won't even realize they're learning at the same time.

The lesson: water is denser than oil and the two liquids never mix. So, when the water in your ocen jar moves, it pushes the oil around making shapes like waves.

Here's what you'll need:
  • Clear jar or bottle with lid
  • Water
  • Blue food coloring
  • Glitter
  • Baby Oil
  • Plastic floating toys
Now get started on bring the ocean to you:
  1. Fill the jar or bottle halfway with water.
  2. Add drops of the blue food coloring until your like the color you see. Shake in a little glitter to add a little pizazz to your ocean water.
  3. Pour baby oil into the jar until it's three-quarters full.
  4. Place a floating toy or multiple floating toys on top of the oil, and then screw the lid on until it's pretty snug and tight.
  5. Shake the jar gently to make some waves and set your ocean in motion! Think about this: when you shake the jar side to side are the waves produced different than those you see when you shake the jar in an up-and-down motion? 

Tuesday, July 16, 2013

Chocolate Chip Cookies: Science-fied!

The following recipe for chocolate chip cookies was adapted from a recipe that appeared in Chemical & Engineering News (C&EN, June 19, 1995, p. 100). It was attributed to Jeannene Ackerman of Wico Corp. The recipe was published in Fisher Science Education's March/April 2013 issue of Headline Discoveries.

Ever wonder what a chocolate chip cookie looks like from a chemist's perspective? 

The ingredient list will probably look a lot like this:
  • 532.35mL (283 grams) finely milled wheat grains
  • 4.9mL NaHCO3
  • 4.9mL refined halite
  • 226.8 grams (2 rectangular prisms) partially hydrogenated tallow triglyceride
  • 177.45mL crystalline sucrose (C12H22O11)
  • 177.45mL sucrose-molasses mixture
  • 4.9mL vanillin-ethanol solution
  • Two calcium carbonate-encapsulated avian albumen-coated protein
  • 473.2mL theobroma cacao
And here's how a chemist would go about making these ooey-gooey favorites:
  1. Add the finely milled wheat grains, NaHCO3 and refined halite to a 2L jacketed round reactor vessel (reactor #1) equipped with a sir mechanism.
  2. In a second 2L reactor vessel fitted with a radial flow impeller operating at 100 rpm, app the triglyceride, sucrose, score-molasses mixture and vanillin-ethanol solution until the mixture is homogenous.
  3. Add the encapsulated albumen-coated protein followed by three equal portions of the homogenous mixture in reactor #1. Add the theobroma cacao slowly with constant agitation. Care must be taken at this point in the reaction to control any temperature rise that may be the result of an exothermic reaction.
  4. Divide the resulting slurry into spheres each approximately 65mL in volume. Place individual spheres on a 316 SS sheet (300 x 600mm). Heat in a 450°K oven for a period of time that is in agreement with Frank & Johnston’s first order rate expression (see JACOS, 21, 55), or until golden brown.
  5. Once the reaction is complete, place the sheet on a 300°K heat-transfer surface allowing the product to come to thermal equilibrium.
Want to take this recipe (or yummy experiment, whatever you'd like to call it) to the next level? Think about these discussion points: 
  • If you wanted to add peanuts or dark chocolate to your cookies, what would you add to the list of ingredients?
  • Write your own chemist's recipe for a baked treat using the format above.

Thursday, July 11, 2013

Summer Science Experiment: Homemade Flubber!

Yes, you read that correctly: I said flubber! Your children will be thrilled to have a bag of their very own flubber to show off the rest of the neighborhood kids and will enjoy squeezing it and playing with it even more! 

Just grab a few things from around the house and you'll be ready to get started. When you're all finished, you and your kiddos will have some awesome green flubber to play with (minus all the super bounce power that it possesses in the movie!) 

Here's what you'll need:
  • 3/4 cup cold water
  • 1 cup liquid Elmer's glue
  • Liquid food coloring (Blue and yellow to make a nice green color or any other color that you'd like!)
  • 1/2 cup hot water
  • 1 teaspoon borax (you can find this in a box in the laundry aisle)
  • 2 bowls
Directions:
  1. In bowl one, mix together the cold water, glue and food coloring. Once mixed, set aside.
  2. In bowl two, mix together the hot water and borax until the borax is completely dissolved.
  3. Slowly add the glue mixture to the borax mixture. Mix well and pour off any excess water.
After that all you have left to do is enjoy! (And clean up, of course.)

Friday, June 28, 2013

Summer Science Experiment: Mystery Markers!

Summer heat is officially taking over. Since your youngsters can't spend all day outside, bring them inside and embrace their inquisitive side with another summer time experiment that you can do right inside your kitchen. Even better, you'll enjoy this experiment as much as your kids will.

Here's what you'll need:
  • Bowl of water
  • Plain white paper towels, cut into strips
  • 3 or more different markers, including black (non-primary colors work best)
When you have all your materials together, get started!
  1. Draw a wavy line an inch from the bottom of each towel strip, using different color markers on each one. Make sure you note which color is on which strip.
  2. Dip each strip in to the water so that the bottom edge of the paper towel is submerged, but not the line of marker ink. Hold the strip in place as the water creeps up the paper towel.
  3. The marker ink will spread, revealing the different types of dye that make up each color. The young minds around you will this it's magic!
The lesson here is that most colors are actually made up of several different colors or dyes. Science-ly speaking:  as the paper towel draws the water out of the bowl, the water molecules bond with the different ink molecules and spread them. The process of separating these dyes is known as chromatography. 

To make it really interesting, have your young scientist cover up their eyes while you draw a line on a fresh paper towel strip. Dip it in the water and, once the ink has spread, have them open their eyes and try to guess which marker you used!

Thursday, June 13, 2013

Summer Science: Ivory Soap Explosion

Your kids are home for the summer and when bad weather keeps them from playing outside or heading to the pool, back up plans can be few and far between. Cue science experiments you can do with them in your kitchen! Why not do something that's fun and teaches your young ones a thing or two about science?

The Ivory soap experiment will do just that. In fact, it will probably produce a reaction neither you or your child were expecting. 

Here's all you'll need:
  • One bar of Ivory soap
  • A microwave
  • Paper plate or towel

Now, prepare yourself to be amazed. (Okay, maybe not amazed, but you will be surprised - as will the young scientist in your midst.)
  1. Cut the bar of Ivory soap in half and then cut each half in half, so that you have quarters.
  2. Put one quarter (one piece) of the soap bar into the microwave and heat for 1-2 minutes. You might want to put the soap on a paper plate or towel to minimize clean-up after the experiment.
  3. Now observe what happens! The reaction happens relatively quickly; around one minute, but definitely less than two.
  4. After you've seen what happens to the first quarter of the bar of soap, do it with the other three pieces you have left. Watching it react it in the microwave never gets old!
  5. After the soap has reacted, explore it through touch, smell and play. It will be dry and soft and have a texture similar to tissue paper.
To enhance this experiment even more, try adding water to the reacted soap and see what happens!

Thursday, February 14, 2013

Valentine's Day Science: Frozen Vinegar Hearts!

What kid doesn't love baking soda and vinegar? Okay, as individual ingredients, maybe not. But as reactive counterparts, heck yeah! These two ingredients - and some hearts, of course - make for the perfect Valentine's Day activity.

We all know about the standard baking soda and vinegar reaction: vinegar is an acid; baking soda is a base; and together you get a chemical reaction that produces water and salt. But have you ever thought about what happens when you freeze the vinegar or baking soda or both...? Well, you better experiment to find out!

Here's what you'll need:
  • Baking Soda
  • Vinegar
  • Water
  • Freezer Trays/Molds (In heart shapes for festive-ness)
  • Red & Blue Food Coloring
Start off by filling your freezer trays or molds half full of water and half full of vinegar. If you use more vinegar, you'll get more bubbles faster later. Once the trays are full, add a drop or two of food coloring and freeze those bad boys. While they're in the freezer, add one teaspoon of baking soda to one cup of water and stir it until it dissolves. Make this mixture blue and put it in a pan or bowl. 

Once your vinegar hearts are frozen, pull them out and start exploring. Start by putting the frozen hearts in the baking soda/water mixture. Ass the ice melts, the baking soda and vinegar will react. What does this look like? (You'll observe bubbles, excitement and the colors mixing.)

Switch things up and add baking soda directly to the frozen vinegar. To illustrate that baking soda and water don't react, try adding baking soda to a normal frozen ice cube and note what happens (nothing).

Remember: this is all about exploration and investigation so make observations as you go along. Even if it means that you notice that the ice heart floats on the water. More ideas for this experiment and more Valentine's Day activities can be found here.

Friday, February 8, 2013

Nominate Your Favorite Teacher for the Presidential Award!

Each year, the President of the United States recognizes extraordinary teachers of mathematics, science and computer science for their work in the classroom. Now, more than ever, applauding STEM efforts in the classroom is a pretty big deal as schools lack teachers in these subjects.  Nominations of 7-12th grade teachers for the 2013 Presidential Awards for Excellence in Mathematics and Science Teaching (PAEMST) are currently being accepted through April 1. Awards alternate every year between recognizing elementary and secondary school educators.
 
If you'd like to nominate a deserving science, computer science or math teacher, go to www.paemst.org. The nomination process doesn't stop there! Once an educator is nominated, he/she must complete the application by May 1, 2013. After that, we all wait. Selected teachers will receive recognition from the President, a $10,000 award from the National Science Foundation (NSF) and an opportunity to travel to Washington. D.C. for the celebration and other professional development activities. Score!
 
Since 1983, over 4,200 teachers have been recognized for their contributions in the classroom and to their profession. The NSF administers the PAEMST on behalf of the White House Office of Science and Technology Policy. Likewise, each year, Albert Einstein Distinguished Educator Fellows (meet them) serve on the PAEMST team to support the awards program.
 
So get out there and get to nominating! We nominated someone, who are you going to nominate?!

Friday, February 1, 2013

How to Make a Naked Egg

Since weekends these days have been all about experiments, here's one you and your children will mutually enjoy! Have you ever made a naked egg? Yes, that's right, an egg without a shell. Most people have never seen an egg without its shell. In fact, most people didn't even know it was possible, but luckily for you, with science, the possibilities are endless. Check out Imagination Station's anatomy of a chicken egg for some background before you begin the experiment.

The shell of chicken egg is typically primarily made up of calcium carbonate. If you soak this egg shell in vinegar (which is normally around 4% acetic acid), you start a chemical reaction that dissolves the calcium carbonate shell. The acetic acid reacts with the calcium carbonate in the egg shell and releases carbon dioxide gas that you see as bubbles on the shell. So how does the egg stay together? The egg insides remains intact because its held together by the two fragile membranes just inside the shell. 

So let's get started! Here's what you'll need:

  • Vinegar (at least 16 ounces)
  • A couple of glasses
  • Raw eggs

Thankfully, the process is easy. So that you don't break the egg from the get go, carefully place the egg into the glass and then fill the glass with vinegar so that the egg is completely covered. If the egg starts floating a bit, that's okay! As long as there's enough vinegar in the glass to mostly cover the top of the egg, you're golden.


Next is the worst part of the experiment: waiting. You must wait for the acetic acid in the vinegar to react with the calcium in the egg shell. Shortly after you cover the egg, you should see some bubble appearing on the outside of the egg. What you're looking at is carbon dioxide gas produced from the reaction. It can take anywhere from 12-24 hours for a good portion of the shell to be removed. Good progress is being made when you notice a white frothy scummy layer on the surface of the vinegar.

Once you've let the egg soak for a day, you can finally take it out! You have to be careful when you're taking the egg out of the glass. While fishing it out with a spoon might sound like a good idea, it can result in the egg breaking or being damaged. Instead, pour the liquid into another cup and gently catch the egg with your hand as it comes out. One you have the egg, you should be able to literally rub the shell off of the egg with you fingers. The shell will come off as a white powdery substance. Be careful during this process so that you don't break the egg.

If your egg isn't quite fully naked yet, fill up another glass with vinegar and soak the egg overnight again. After two days of soaking, you should have a completely naked - and very, very cool looking - egg. Notice that after the second day of soaking your eff is a bit bigger than it was after the first day. This is because some of the vinegar (and some of the water in the vinegar) has moved through the egg's semi-permeable membranes to the inside of the egg. Ladies and gentlemen, this is called osmosis!


For a list of fun things to do with your naked egg, instructions on how to shrink your egg, information on eating the egg or how it smells and some science fair project ideas, click here. 

Friday, January 18, 2013

Weekend Experiment: Make a Sparkly Explosion!

It's Friday again. That means your trying to figure out exactly what you're doing this weekend. Well, good news: I have a science experiment that will be fun for you and your children! What child doesn't request experiments that explode, sparkle or use fire? The more she-bang, the better. Let your children lead you through this sparkly explosion and you'll love the creation as much as they do.

Here's what you'll need:

  • A vase
  • Baking soda
  • Vinegar
  • Food coloring (in your child's favorite color, of course!)
  • Blue glitter (Glitter is integral to this activity, but you can use any color you'd like.)
  • Other supplies like salt, spaghetti noodles, pepper and anything else you and your child dream up
  • A pan to contain the mess

Now that you have everything you need, here's what you'll need to do.
  1. Start by placing 2-3 tablespoons of baking soda into the bottom of the vase and then place the vase in the pan.
  2. Add 6-7 drops of food coloring and 1-2 teaspoons of glitter to the vase.
  3. Quickly pour in about 1/2 cup of vinegar and then...watch for the sparkles!
  4. When the reaction is over, repeat the experiment, but this time let your child choose what supplies they want to add. For example, what does pepper look like in the "explosion?" Does salt change how the reaction works? What if you add spaghetti noodles? Remember that you and your child are experimenting, so let them change the variables, predict what they think will happen and then view the results.

At some point in the experiment, review with your child that baking soda and vinegar react when mixed together to make an explosion. If you're child is old enough, go further and explain that baking soda is a base while vinegar is an acid, and that mixing any base with an acid results in some sort of reaction. Carla did this experiment with her children, check out how it went and what she has to say.

Tuesday, January 8, 2013

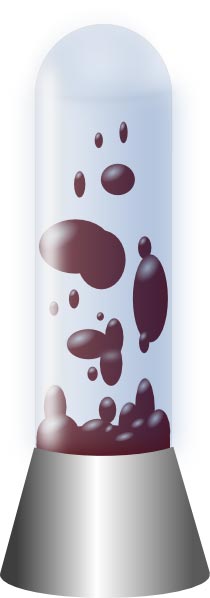
Make a Lava Lamp This Weekend!

Make a simple lava lampLooking for a fun and easy experiment to do with your kids this weekend? Well look no further. Do you remember being mesmerized by the mystery of a lava lamp when you were a kid? The brightly colored "lava" would float back and forth from the top and bottom of the lamp, combine with other "lava" blobs and then break away from them - it was seriously magical!

With just water, a clear plastic bottle, vegetable oil, food coloring and some Alka-Selzter (or other tablets that fizz) you can create your own lava lamp on your kitchen counter.

Once you have everything you need to get started, here's what you'll need to do:

  1. Pour some water into the plastic bottle until it's about a quarter full.
  2. Pour some vegetable oil into the bottle until it's just about all the way full. 
  3. Wait until the water and oil have clearly separated.
  4. Add around a dozen drops of your favorite color food coloring to the bottle.
  5. Observe the food coloring make its way through the oil and into the water, mixing.
  6. Cut an Alka-Selzter tablet into five or six smaller pieces and drop one of them into the bottle - things should start getting a little crazy, just like a real lava lamp.
  7. When the bubbling stops, add another piece of the Alka-Selzter tablet and enjoy!
If you're wondering what the science is behind this experiment, check this out: you know that oil and water don't mix very well (or at all), so the two separate from each other with the oil on top because it has a lower density than water. The food coloring is able to fall through the oil and mix with the water - key to this experiment! When you drop the Alka-Seltzer in, it releases small bubbles of carbon dioxide gas that rise to the top of the bottle, taking some of the colored water with it. The gas escapes when it reaches the top of the bottle and the colored water falls back to the bottom. To read more about the science involved, visit the Science Kids website.

Wednesday, December 12, 2012

iON Future: Exactly What STEM Needed

Every day, professionals in STEM careers help people get better, discover new things, save the planet, build the future, solve mysteries and play with some very neat tools. Makes you wonder why getting today's youth involved in STEM can be so difficult sometimes.  Well say hello to Change the Equation's iON Future: The STEM Exploration Game!

iON Future lets you explore STEM careers, identify the ones that best match your interests and then play your way to your dream STEM future. Can you say genius?! What kid doesn't enjoy a good, engaging computer game these days. I know I can't think of one. Combining iON Future with all the other platforms designed to ignite excitement in students about STEM, the United States is moving in the right direction.

iON Future dispels notions that STEM embodies the traditional science, technology, engineering and math careers that so many students find daunting and boring. In fact, the site includes careers like 3D animator, athletic trainer, automotive designer, librarian and science reporter. Any child can find something they're interested in and then discover how it relates to STEM. It's exactly what STEM education needed to supplement classroom efforts.

Check out the website, create an account with your child or play as a guest - you may even learn something new!